


Working with a large-sized ceiling brush can be a game-changer when it comes to painting, cleaning, or other ceiling-related tasks. As a ceiling brush supplier, I've had the opportunity to see firsthand how these tools are used and the challenges that users may face. In this blog post, I'll share some tips and techniques on how to handle a large-sized ceiling brush effectively.
Understanding Your Large-Sized Ceiling Brush
Before you start using a large-sized ceiling brush, it's important to understand its features and capabilities. Different types of ceiling brushes are designed for specific purposes, and choosing the right one can make a significant difference in the outcome of your project.
Types of Large-Sized Ceiling Brushes
- Plastic Handle Synthetic Ceiling Brush: These brushes are made with synthetic bristles, which are durable and resistant to chemicals. They are ideal for applying water-based paints, stains, and sealers. The plastic handle provides a comfortable grip and is easy to clean.
- Wood Handle Bristle Ceiling Brush: Bristle brushes are made with natural or synthetic fibers and are suitable for oil-based paints and varnishes. The wood handle gives a traditional look and feel and can provide a good grip.
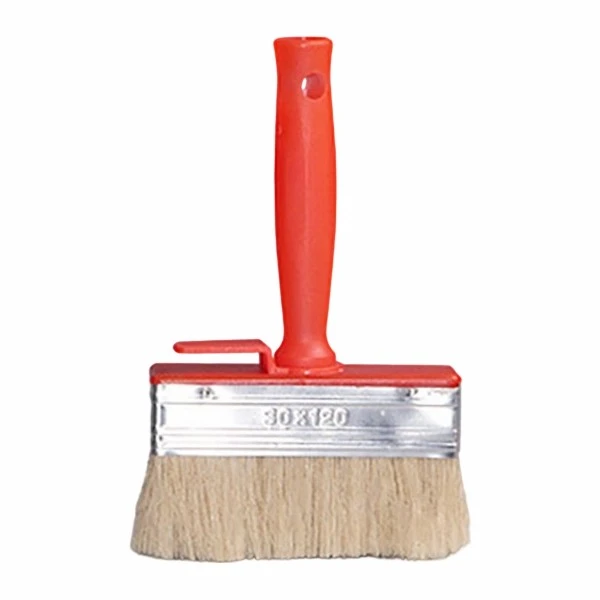
- Plastic Handle Ceiling Brush: This type of brush can be used for various applications. The plastic handle is lightweight and easy to maneuver, making it a popular choice for both professional painters and DIY enthusiasts.
Preparing for the Task
Proper preparation is key to a successful ceiling project. Here are some steps to take before you start using your large-sized ceiling brush:
Safety First
- Wear Protective Gear: Put on safety goggles to protect your eyes from paint splashes or debris. A dust mask can prevent you from inhaling fumes or particles. Gloves can also protect your hands from chemicals and paint.
- Set Up a Safe Work Area: Use a stable ladder or scaffolding to reach the ceiling. Make sure it is properly secured and positioned on a level surface. Cover the floor and furniture with drop cloths to protect them from paint drips.
Brush Preparation
- Clean the Brush: If you're using a new brush, rinse it under running water to remove any manufacturing debris. For a used brush, soak it in the appropriate solvent (water for water-based paints, mineral spirits for oil-based paints) to clean it thoroughly.
- Shape the Bristles: Gently comb the bristles with a brush comb to remove any tangles and shape them evenly. This will ensure a smooth application of paint.
Handling the Large-Sized Ceiling Brush
Once you're prepared, it's time to start using your large-sized ceiling brush. Here are some techniques to help you handle it effectively:
Holding the Brush
- Proper Grip: Hold the brush firmly but not too tightly. The grip should allow you to control the brush's movement without causing fatigue. For most people, a grip that is similar to holding a writing instrument works well.
- Angle of the Brush: Hold the brush at a slight angle to the ceiling surface. This will allow the bristles to spread the paint evenly and prevent streaks.
Applying Paint
- Load the Brush: Dip the brush into the paint, making sure to cover about one-third of the bristles. Tap the brush gently on the side of the paint container to remove any excess paint.
- Start with an Edge: Begin painting at the edge of the ceiling, working your way towards the center. Use long, smooth strokes to apply the paint evenly. Avoid pressing too hard on the brush, as this can cause the paint to drip or create an uneven finish.
- Overlap Strokes: As you paint, overlap each stroke slightly to ensure a seamless finish. This will help to prevent streaks and ensure that the paint is applied evenly.
Maintaining a Consistent Pace
- Work in Sections: Divide the ceiling into manageable sections and work on one section at a time. This will help you maintain a consistent pace and ensure that the paint dries evenly.
- Avoid Drying Lines: Try to complete each section before the paint starts to dry. If you need to take a break, make sure to clean the brush thoroughly and cover the paint container to prevent the paint from drying.
Cleaning and Storage
Proper cleaning and storage of your large-sized ceiling brush are essential to ensure its longevity and performance.

Cleaning the Brush
- Immediate Cleaning: After you finish using the brush, clean it as soon as possible. For water-based paints, rinse the brush under running water until the water runs clear. For oil-based paints, soak the brush in mineral spirits for a few minutes and then rinse it thoroughly.
- Deep Cleaning: If the brush is heavily soiled, you may need to use a brush cleaner. Follow the manufacturer's instructions for the best results.
Storage
- Dry the Brush: After cleaning, shake the brush gently to remove any excess water or solvent. Hang the brush by its handle to dry completely. This will prevent the bristles from becoming misshapen.
- Store in a Cool, Dry Place: Once the brush is dry, store it in a cool, dry place. Avoid storing the brush in a way that will cause the bristles to bend or become damaged.
Troubleshooting Common Issues
Even with the best techniques, you may encounter some issues when using a large-sized ceiling brush. Here are some common problems and how to solve them:
Streaks or Uneven Finish
- Cause: This can be caused by applying too much paint, using a brush with worn-out bristles, or not overlapping strokes properly.
- Solution: Apply less paint to the brush and use long, smooth strokes. Replace the brush if the bristles are worn out, and make sure to overlap each stroke slightly.
Paint Drips
- Cause: Applying too much paint to the brush or working in a too humid environment can cause paint drips.
- Solution: Tap the brush gently on the side of the paint container to remove any excess paint. If the environment is too humid, try using a dehumidifier or wait for a drier day to paint.
Bristles Falling Out
- Cause: This can be caused by using a low-quality brush or not cleaning the brush properly.
- Solution: Invest in a high-quality brush and make sure to clean it thoroughly after each use.
Conclusion
Handling a large-sized ceiling brush effectively requires proper preparation, technique, and maintenance. By understanding the different types of brushes available, preparing your work area, and using the right techniques, you can achieve a professional-looking finish on your ceiling projects. As a ceiling brush supplier, I'm here to provide you with the best products and advice to help you succeed. If you're interested in purchasing high-quality ceiling brushes or have any questions about our products, please feel free to contact us for a procurement discussion.
References
- "Painting Techniques for Beginners" by DIY Painting Magazine
- "The Complete Guide to Brush Care and Maintenance" by Brush Manufacturers Association


